Modern Web Development: an installation guide
The batteries-included guide to what UTS doesn't teach you. This post is for Windows users trying to get started with web development.

The batteries-included guide to what UTS doesn't teach you
This post is aimed at the majority of people who use a Windows machine and want to get into web development in 2022. Modern web development has some fairly common environment setups, and this guide aims to explain all the software you'd need to be on top of things.
This guide covers how to install:
- VS Code (the most popular web development environment)
- VS Code Extensions
- WSL2 Ubuntu (WSL = Windows Subsystem for Linux, developed by Microsoft)
- Node.js (using NVM)
- Docker Desktop (for building your apps, as well as running database servers locally with ease)
- Setting up SSH keys for Github
Visual Studio Code
VS Code is currently the most popular IDE (Integrated Development Environment) for web development. It supports writing code in basically all JavaScript-related web setups, and is fairly lightweight compared to many alternatives.
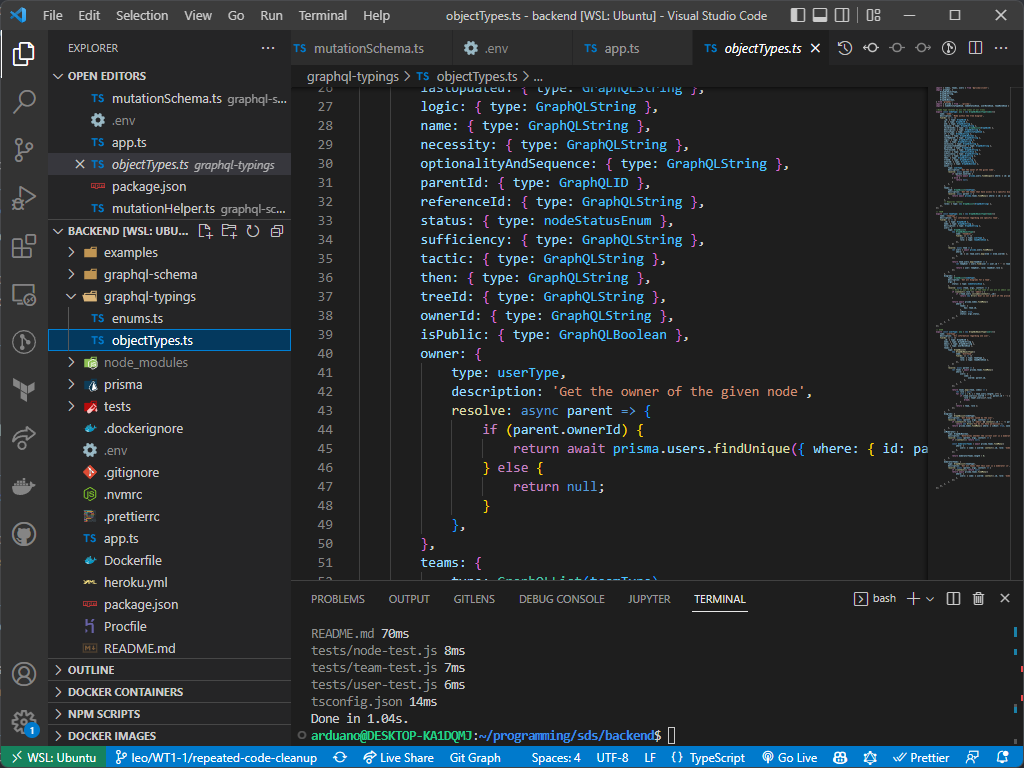
You've probably seen it before, it looks something like this:
Installing VS Code is fairly straightforward, via the Official Website.
Inside VS Code, there are a bunch of buttons on the left sidebar that you need to get familiar with. The most important ones are:


Extensions to install
Go to the extensions tab and install these extensions which are important for the guide:


After installing it, consider installing the following optional extension that may make your life easier:


VS Code Settings
Some nice settings to change. Most of these are optional, but are really nice to have:


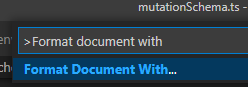
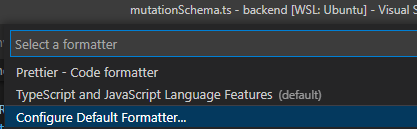
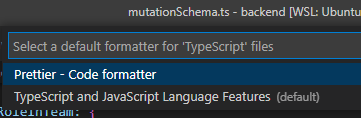
Also, to select Prettier as your default formatter, you need to open any Typescript or Javascript file inside VS Code, then while the file is open, do Ctrl+Shift+P to open the commands menu, then search for "format document with"
Configure the default formatter:
And select Prettier
Installing WSL2
WSL2 is basically like running a Linux virtual machine under Windows. However it integrates fairly seamlessly with Windows and was developed by Microsoft.
The simple way to install WSL2 is to go to the Microsoft Store (yes, that app you never use), and install Ubuntu:

If this doesn't work, or you already have WSL1 installed, try following this guide by Microsoft:
If you have an older version of windows, make sure to look over this:
Why Linux?
Linux has a much better experience for developers. For example, NVM (Node Version Manager) just works with no issues while on windows you need to enable admin permissions each time you want to use it. When you delete large folders, on Windows sometimes you get file lock issues (remember those issues where you can't delete a folder without restarting your whole computer for no reason, while on Linux it just works), which is especially good for node_modules folders. Also, your code will likely run on a Linux server in production, so developing on Linux is nice to make the environment be the same.
Ways to access WSL from windows
To get inside Ubuntu, you can:
- Open "Ubuntu" via the start menu
- Open CMD, then type
wsl. Afterwards, typecd ~to get into your home folder.
Important note!
When using WSL2, make sure you use the home folder ~, instead of any mounted windows drives. Mounted windows drives will be really slow under WSL2, so make sure you only write code somewhere inside the home folder.
What's WSL 1 then?
WSL1 was just an abstraction layer over Windows, kind of like Wine/Proton for Linux or Mac. This meant there was no virtual machine, and it had some limitations.
WSL2 is a proper virtual machine running under Windows's Hyper-V. This does mean that it doesn't have direct access to windows drives. They're mounted as samba partitions, which makes them really slow. Instead, it's recommended to program in the home folder ~ as that is purely managed by the VM and is really fast.
Browsing your WSL2 files
When inside the WSL2 terminal, you can open Windows Explorer in the current folder by typing explorer.exe ., and the path would look something like this:

Or if you want to open VS Code in the current folder, then type code .
Installing Node (via NVM)
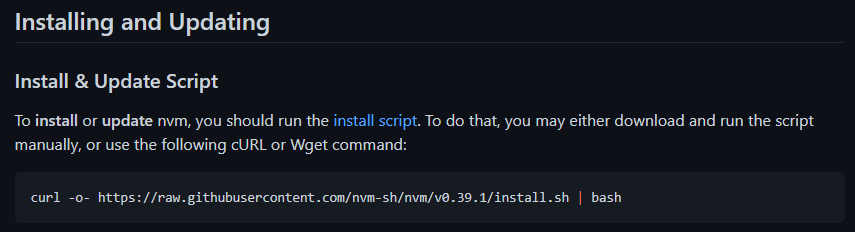
NVM (Node Version Manager) makes life really easy with balancing multiple node versions or just installing/updating node in the first place. The project can be found here.
To install the latest version of NVM, run the command on the project page, the command should look something like this:
After the command finishes, close the terminal, then open the terminal again. This refreshes the environment variables.
Then, run nvm install 16 to install Node.js version 16, which is the recommended version as of 2022. If this command successfully runs, then everything is installed correctly.
Install Yarn
Please use yarn instead of npm. It will make your life so much easier.
Anyway to install it, run npm install -g yarn, then after that you'll never need to touch npm again.
You'll have to run this command every time you install new node versions with nvm.
VS Code extension

Install this extension to automatically run nvm use in your terminal when you open a new terminal. This will make sure that all new terminals use the node version specified in your .nvmrc file.
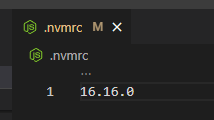
.nvmrc files look something like this:
Docker Desktop
This is technically optional, but could be very helpful for your projects if you know how to use it.
ProgSoc is running a Docker workshop soon, more details about Docker will be added here after the workshop runs.
To install Docker Desktop, download and run the installer here on their official website.
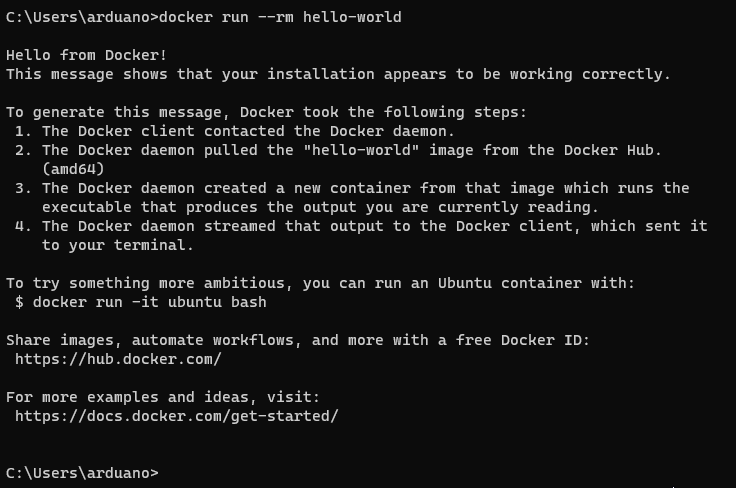
After that, docker should just work in both Windows and WSL2. Verify that it works by running:
docker run --rm hello-worldIn both Windows and WSL2. The command should have this output:
Setting up SSH Keys for Github
SSH stands for "Secure Shell". It allows computers to talk to each other securely. Git supports using SSH to transfer data around, and currently using SSH keys is the standard way to authenticate with Github.
Here is a step by step guide for creating an SSH key and connecting it to github under WSL2:
First, start in the WSL2 home folder using cd ~. You likely don't have a .ssh folder yet, the easiest way to create one is by typing ssh git@github.com and then typing yes when it asks you.
Next, cd .ssh to go into the folder that was just created. You an open VS Code inside the folder by typing code .
Now you're in the folder. Run ssh-keygen to generate a key pair. Type github for the name, then press enter twice to skip the optional passphrase part.
You should have 2 new files in the folder: github and github.pub. The github.pub file is your public key, while the other file is the private key. Never share your private key with other people.
Now, you should go your user settings in Github, under the "SSH and GPG keys" section.
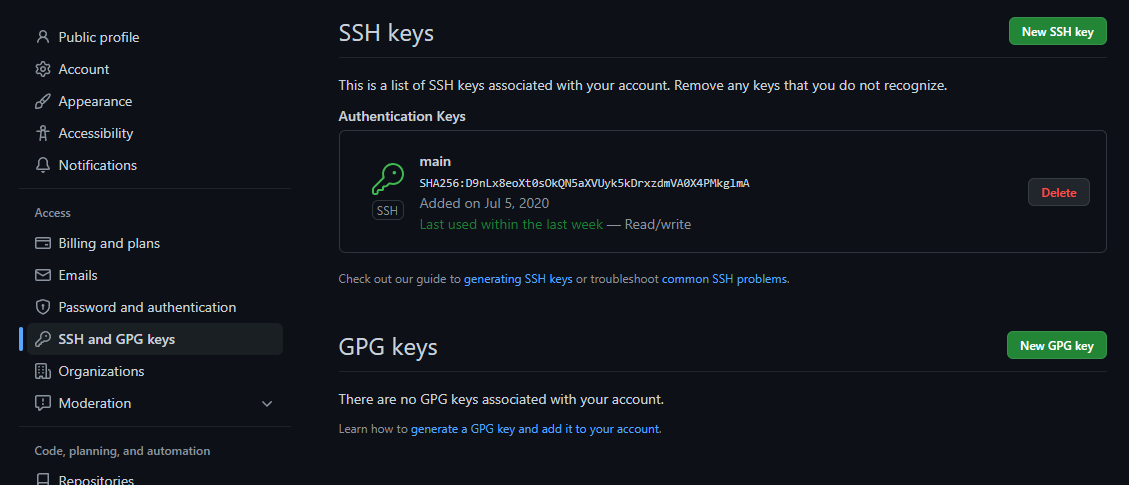
Press "New SSH Key", give it a title (can be anything, e.g. "laptop" or "main key" or anything else), then for "key" copy-paste the contents of the github.pub file. Then create your key.
Now, go back to VS Code.
Create a new file called config and copy paste this inside:
Host github.com
    User git
    IdentityFile ~/.ssh/github
This tells SSH what key to use for authenticating to github.
Then, in the terminal, run chmod 600 ./config to secure the file. If you don't do that, SSH will complain that it is unsecured.
To make sure everything works, run ssh git@github.com again. If everything is correct, it should output:

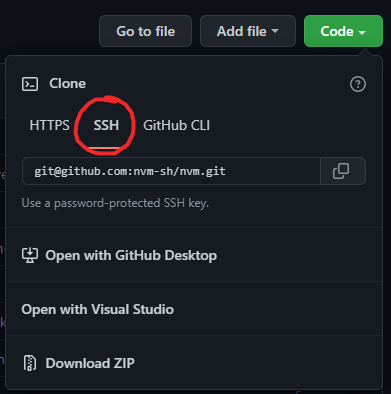
Now, when cloning any github projects, make sure you use the SSH link rather than HTTPS:
Final notes
If there are any issues with following this guide, or if you feel like something important should be added or changed, feel free to ask about it on the ProgSoc Discord server.
Happy coding!